Wednesday, September 21, 2011

Baby needs a changing pad

Here is another baby crafty! I have seen tons of cute changing pads out there, and I decided to make one for myself.  Of course I had to pick purple fabric with birds on it! I made it with a pocket for wipes or a diaper, and it has a velcro closure.  The finished pad measures 13.5 x 21.5 and folds up to fit right into a diaper bag. It was super easy and super fun to make!!


Cut the fabric to measure 14 x 22 inches.  The purple fabric is cotton,  the inside is a soft terry cloth, I fused fleece interfacing to the wrong side of the cotton fabric to give it a little bit more padding.  


For the pocket cut the piece to be 7.5 high.  Fold down a 1/4 inch and iron at the top of the pocket and top stitch.


Lay the terry cloth down with the pocket right side up at the bottom, then lay the cotton fabric right side down on top to create a sandwich with the pocket in the middle.  Pin all sides together and sew down all sides leaving a space to flip the fabric right side out.


Hole at the top to turn right side out. Clip the corners to get a nice square once it is flipped. 


The last step was attaching the velcro.  Fold up the pad and pin velcro where you want it.  I used the soft half at the top of the pad and the other scratchy half is on the back of the pad, that way baby won't irritate her skin. 

That's it, about an hour later I had a custom changing pad!!


Tuesday, August 23, 2011

Bring On The Baby Crafties!!

It has been much to long since my last post! Between all my summer travels and my own pregnancy the time just got away from me.  I knew it had been too long when my best friend lovingly threatened to not follow my blog anymore unless I posted something soon. So that leads me to the beginning of the baby crafties!! I have a couple friends pregnant now, including myself, so I have many crafties in the making all having to do with babies. The first one was so much fun to make I forgot to take pictures during the process, and only have the finished product to show.  So here they are, my appliqued onesies for my dear friend Mischa's baby due in September.

To make these I used my die-cut machine to cut cute pictures out.  I traced them onto some Wonder Under, available at all craft stores, and transfered them to the onesie.  I decided to hand applique them since there were so many tiny details.  A couple of buttons for eyes and noses, and I was done!


A fun tree

A cute little squirrel 
Mischa opening gifts

Whimsy armadillo 


This owl was for my best friend,  I used the same fabric from her wedding guest book I made. 


Monday, April 4, 2011

What to do with a frame.

After I did my frame makeover here I really wanted to make something with a larger frame.  I searched craft blogs high and low and came up with two inspirations.  The first was this fun frame crafty, and the second was this great spring wreath.  After seeing these two creative crafties I knew just what I was going to make.


I love how it turned out! I love the color pallet (the middle square has a beige background that is hard to see in the picture) and the fun textures.

I bought a 12 x 36 inch frame in black, because it was going on a white wall.  This was hard for me, because I typically like to decorate with white. 


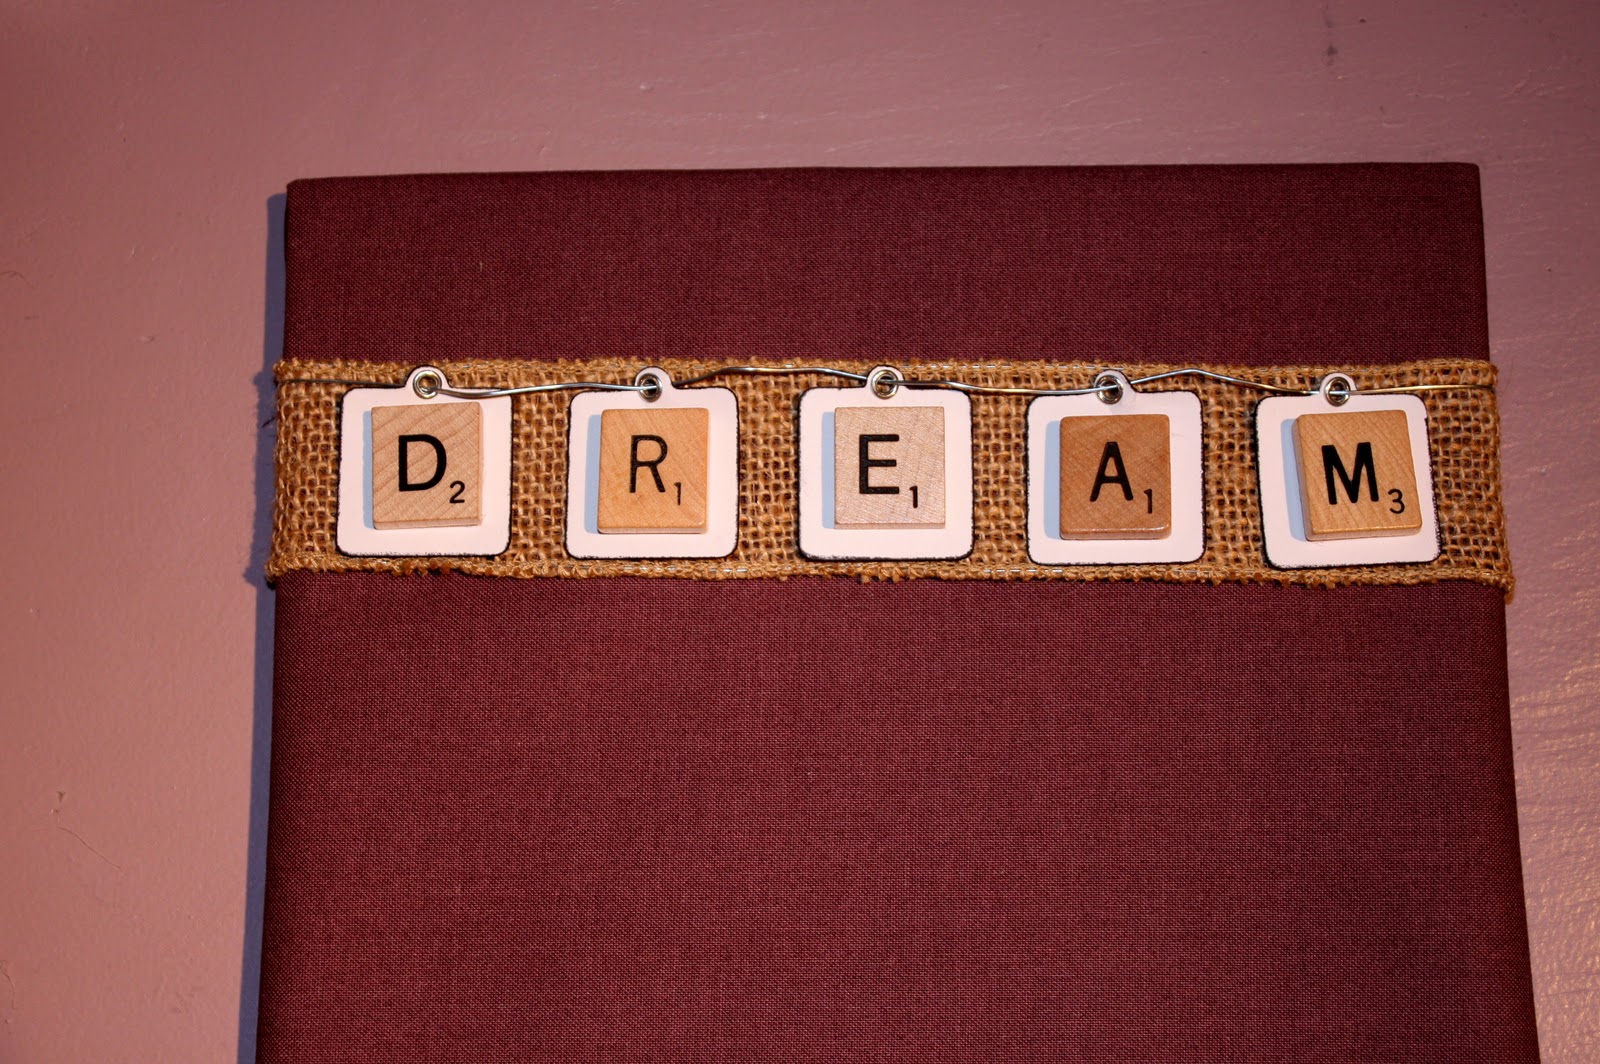
I found some paper that looked like wall paper and I thought it would tell the story I wanted to express with the backgrounds.  I cut out a 5 inch frame with my die-cut machine and and 3 inch G for Griffin.  I of course used my new favorite burlap ribbon and some household twine for texture.  After using twine all over this project I will now use it anytime I can.  It added some needed texture and was so easy to work with. 


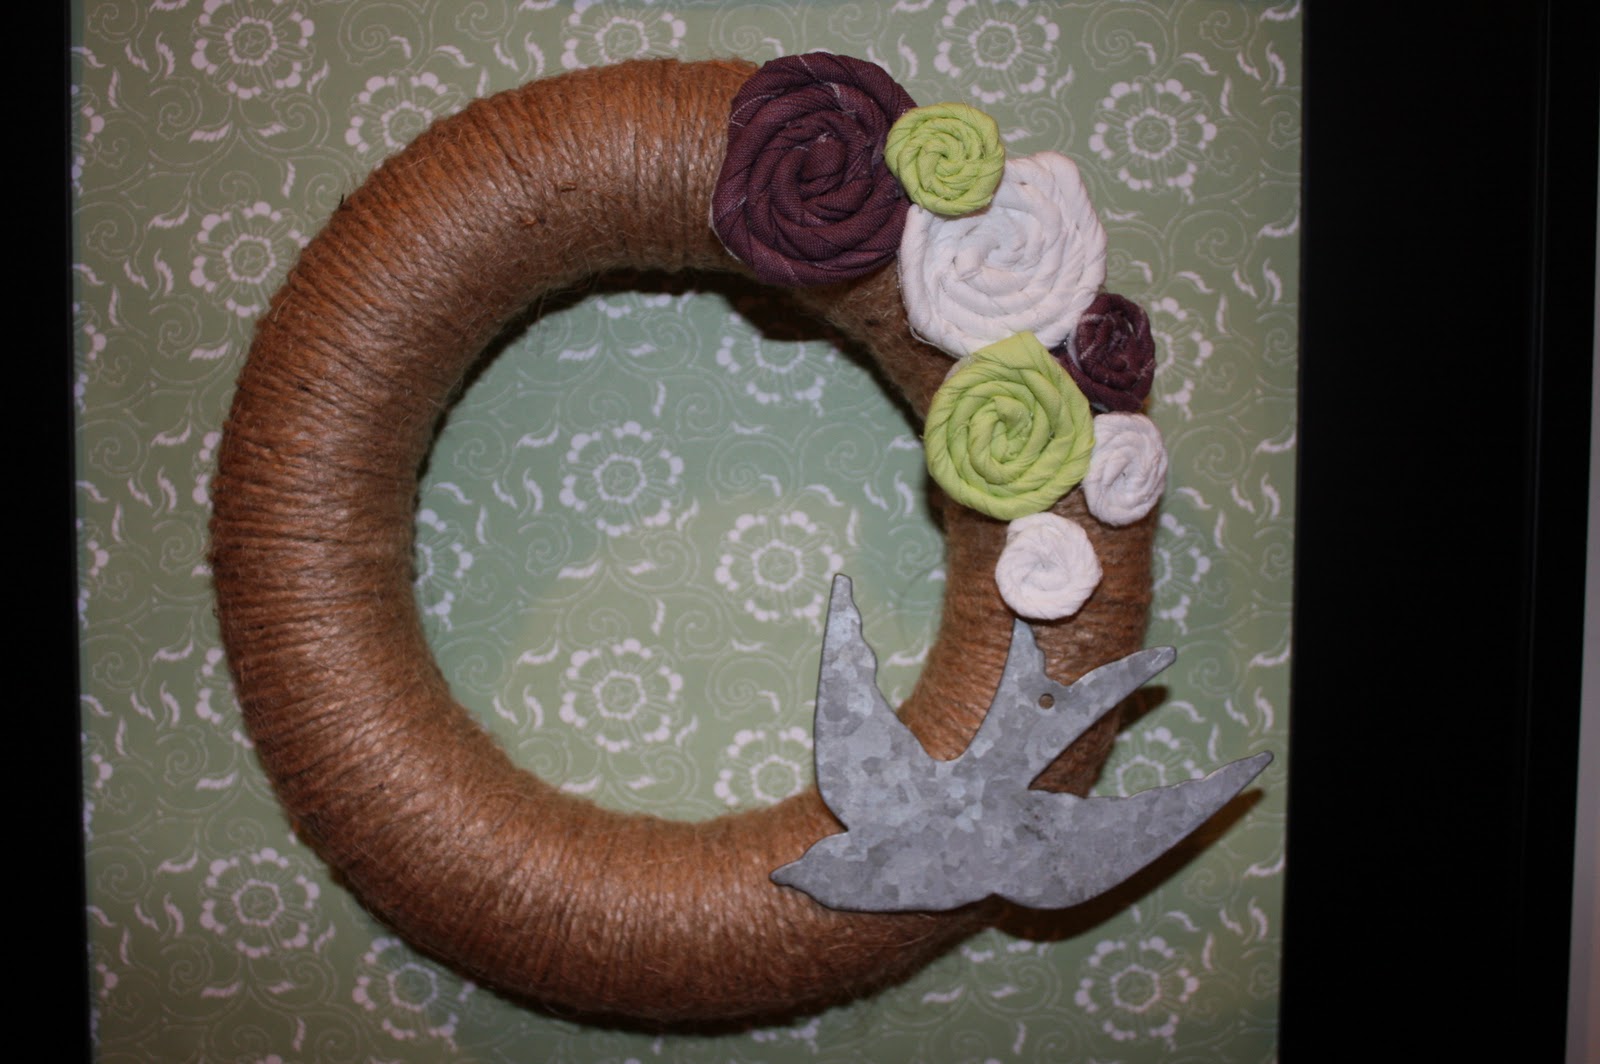
I bought a 6 inch foam wreath and wrapped it with the twine.  I also made some cutie fabric flowers to add some color and whimsy.  I bought a small metal bird a little bit ago, at the time I had no idea what I was going to do with it.  It was waiting around in my craft room for the perfect project, and this was it!


For the first square I glued down the ribbon and the G in the frame. The twine above and below was an after thought and I'm glad I added it. 


The second square I wrapped the twine around in two sections crisscrossing them for depth.  I originally wanted this section to be a place to hang pictures from the twine like in my inspiration.  Now that I am done I like the way it looks with pictures hanging from it and with out them. 


The last section was for my mini wreath.  I glued my flowers down and added the bird and then secured the wreath to the paper.


I hung it on the wall and instantly fell in love with the way it brightens up the space.


Sunday, March 27, 2011

Spring Bouquet

I love this time of year, spring time! It's getting nice out, gardens are being planted, and flowers are coming out.  I have really loved playing with fabric flowers and I wanted to make a flower bouquet that I could have out all spring long.  So I was searching for some inspirations and I come up with this idea.  I found the inspiration here.


Here is what I did.  I bought a 4 inch planting pot and a half circle styrofoam form.  


I used scrap fabric that I already had in spring colors.  I cut the fabric into 2 inch strips.  The longer the strip the bigger the flower.  I used varying lengths to give each flower a different shape. I decided not use the white when I was done. 

To make each flower fold the fabric in half and iron.  Then baste stitch on the selvage ends.  If you want a fray effect like I did for this project here don't fold the fabric in half so the ends fray when you are done. 


When you are done stitching pull on the thread and you will get this.


Here is the fun part, forming the flower! Circle the fabric around each other and shape it into the flower you want.  Stitch it together a couple of times and then add a button or a bead for the center.  Once I had a couple of flowers made I pinned them to my styrofoam form. 


I used pins to keep the flowers in place so I can move them around if necessary. When I was done this is what I had.


I then of course glued some ribbon around the top and I was done.  I had a pretty spring bouquet for my table. 


Things I love about this project. 
I love fabric flowers because there is no wrong way to make them, no flower is the same so it doesn't have to be perfect.  I also love using scrap fabric because it reminds me of what I used the fabric for in the first place.  The blue was used as binding for my first  quilt I ever made, the green was lining for one of my many bags, and the pink I used for decorating a guest book for my best friend's wedding this summer.  

Happy Spring Time!!

Sunday, March 13, 2011

Bird Coasters

I love birds, and I love using them in my crafties.  We were watching Portlandia and they had a skit on that was all about me (see clip in post Put a bird on it).  I was laughing so hard because I had this idea about making coasters with birds on them.

I bought 4 ceramic tiles from Home Depot for 16 cents each, I was very happy about the price! I got rubber adhesive circles to attach to the bottom to prevent skidding.  I picked out some blue paint, and got my bird stencil and got to work.


I lightly traced the stencil on the tile with a pencil.  I used a thin brush to outline it and then filled it in.  I did the same picture on all 4 tiles for simplicity reasons.  I wanted a silhouette of a bird so it would be easy to hide mistakes.  I have limited experience painting, so the simpler the better for me. 

Once they were dry I added the rubber circles on the bottom. 


That was it, I had four new bird coasters to add to my bird collection.


Put a bird on it

I love Portlandia, I always laugh when I watch it.  This clip especially made me laugh.


Saturday, March 5, 2011

Vintage Fun

I love love love vintage things! I especially love vintage objects that were used for everyday life, 
keys are some of favorites.  A friend of mine, Kelly, found me some keys while she was out antiquing.  When I saw them I knew just what crafty I was going to do.  Kelly and I were out looking for some more great finds and I got an old clock, a fence post cap, and some great burlap ribbon (I have never seen burlap ribbon but my house will soon be covered with it).  

 I took my wonderful keys and my great ribbon and I made a little sign.  I had an 8 x 10 picture frame and I used that as my back drop.  I covered it with purple fabric and went from there. 


I had some scrabble tiles that spelled "dream" and thought those would be great with the keys.  I used my die-cut machine and cut square tags to frame the tiles.  I took a black ink pad and stamped the edges of the tags, it gives it a vintage style. I then added an eyelet. 


I glued the tiles down on the paper and glued them to the burlap ribbon.  At the last minute I decided to string some wire through the eyelets, I'm glad I added it! I then secured the banner to the fabric with some hot glue. 


All that was left was to sew the keys to the fabric.  I played around with lots of different layouts and then just finally started attaching them.  I used thick black embroidery floss to make sure it lasted.  I put my new sign in my old frame and I was done!!


I set my sign next to my new treasures in my living room.  It's a happy little reminder to dream everyday!